
Hairline Cracks in Plaster Ceilings: When to Patch and When to Replace

Concerned about hairline cracks in your plaster ceiling? Get expert repair or replacement services in Cambridge. Insured and reliable. Call Now!
Preparing Your Boston-Area Home for Exterior Painting Before Winter Hits
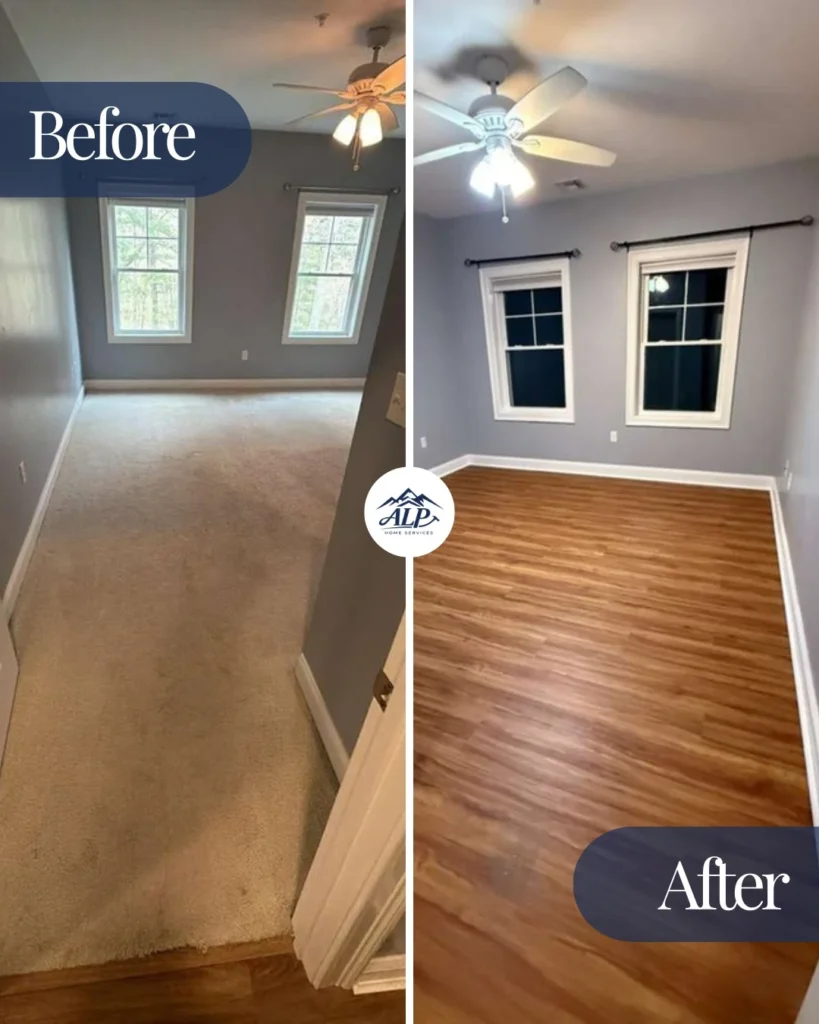
Blog Preparing Your Boston-Area Home for Exterior Painting Before Winter Hits Serving homeowners in Malden and surrounding areas As the vibrant colors of autumn sweep across the Boston area, many homeowners start thinking about protecting their homes before the harsh New England winter arrives. One critical task is exterior painting, but the window for success in fall is surprisingly narrow and requires careful planning to avoid costly mistakes. Understanding the specific challenges of cooler temperatures and shorter days is key to ensuring your paint job lasts. This guide will walk you through the essential steps to prepare home exterior painting in fall, helping you decide if this season is right for your project or if it’s better to wait until spring. Quick Answer: The window for exterior painting in Boston closes around mid-October when nighttime temperatures fall consistently below 50°F*. Prep work in September: power-wash and let dry 48 hours*, scrape failing paint, sand to feathered edges, prime bare wood within 24 hours*, caulk all joints. Top coat must go on during a 3-day dry, warm stretch. Call Now *Pricing varies based on project scope, materials selected, and site conditions. Contact us for a personalized estimate. The Critical Temperature Window for Exterior Painting in Boston Successfully applying exterior paint in the fall hinges almost entirely on temperature. Most paint manufacturers, including leading brands like Sherwin-Williams, recommend that both air and surface temperatures remain above 50°F* for at least 48 hours after application. This isn’t just a daytime requirement; nighttime temperatures are equally crucial for proper paint curing and adhesion. If the temperature drops below this threshold too soon, the paint may not dry correctly, leading to issues like poor adhesion, cracking, or premature peeling. It’s important to distinguish between air temperature and surface temperature. A sunny fall day might feel warm, but if the surface of your home’s siding or trim is still cool from the overnight chill, the paint won’t bond effectively. Professional painters in the Greater Boston area often use surface thermometers to ensure optimal conditions. As a rule of thumb, the window for exterior painting in Malden and surrounding cities typically closes around mid-October, as average nighttime lows begin to consistently dip into the 40s°F* or lower. Painting outside of these recommended temperature ranges can compromise the integrity and longevity of the paint, essentially wasting your investment. For instance, if paint is applied when it’s too cold, the solvents might evaporate too slowly, causing the paint to sag or run. Conversely, if it dries too quickly due to unexpected warmth, it can crack. Getting it right ensures your home’s protective layer performs as intended through the winter. Why Fall Exterior Painting Carries Specific Risks in New England While the crisp fall air can seem ideal for painting, New England’s autumn weather presents several unique challenges that increase the risk for exterior painting projects. The primary concerns are morning dew, shorter daylight hours, and the rapid drop in temperatures as evening approaches. Morning Dew: Fall mornings often bring heavy dew, which can leave exterior surfaces damp well into the day. Painting over a damp surface can trap moisture, leading to blistering, peeling, and poor adhesion once the paint dries. Surfaces must be completely dry before painting, which can significantly cut into already limited daylight hours. Shorter Daylight Hours: With the sun setting earlier, there’s less time for paint to dry and cure properly. A typical paint coat needs several hours to dry to the touch, and often 24-48 hours* to fully cure, especially in cooler conditions. Shorter days mean less drying time, increasing the chance of dew or frost damaging freshly applied paint overnight. Rapid Temperature Drops: Even if daytime temperatures are adequate, the quick drop in temperature after sunset can shock the paint, hindering its ability to form a strong, durable film. This can result in a brittle finish that is more susceptible to cracking and flaking, particularly when exposed to winter’s freezing temperatures and thaw cycles. These factors combined make fall painting a race against the clock and the elements. Without meticulous planning and adherence to strict weather guidelines, the risks of a compromised paint job are substantial. This is why many homeowners choose a professional service for their exterior painting in Greater Boston during this challenging season. Careful prep work is essential for fall painting projects, ensuring surfaces are clean and dry before any paint is applied. Your Fall Painting Prep Timeline: Working Back from First Frost To successfully prepare home exterior painting in fall, you need to work backward from the typical first frost date, which for the Boston area, according to the National Weather Service, usually falls between October 15th and 30th*. This gives you a critical window in September and early October for preparation and application. Here’s a recommended timeline: Early to Mid-September: Inspection and Repairs Conduct a thorough inspection of your home’s exterior. Look for any damaged siding, loose trim, or rotting wood. Address these repairs first. If you need assistance with trim and fascia repair, a professional can ensure these structural elements are sound before painting. Schedule any necessary carpentry work or siding repairs to be completed by the end of September. Mid-September: Cleaning Power-wash your entire exterior to remove dirt, mildew, and loose paint. This step is crucial for paint adhesion. Allow at least 48 hours* for the surfaces to dry completely after washing. In cooler, humid fall conditions, this drying time might need to be extended. Late September/Early October: Scraping, Sanding, and Priming Scrape away any remaining loose or peeling paint. Feather the edges with sandpaper to create a smooth transition between bare wood and existing paint. Apply a high-quality primer to any bare wood within 24 hours* of sanding. This seals the wood and provides a uniform surface for the topcoat. Ensure the primer is rated for cooler temperatures if applying late in the season. Caulk all gaps and cracks around windows, doors, and siding joints. Use an exterior-grade, flexible caulk that can withstand temperature fluctuations.
LVP vs Engineered Hardwood for Massachusetts Rentals: A Landlord’s Honest Comparison
Blog LVP vs Engineered Hardwood for Massachusetts Rentals: A Landlord’s Honest Comparison Serving homeowners in Cambridge and surrounding areas Choosing the right flooring for your Massachusetts rental property, especially in high-demand areas like Cambridge, Somerville, or near BU/Tufts/MIT, is a critical decision. It impacts tenant satisfaction, maintenance costs, and even your property’s long-term value. When comparing LVP vs engineered hardwood for rental units, landlords need to weigh durability, water resistance, replacement costs, and potential rent premiums. For Massachusetts rentals, LVP (Luxury Vinyl Plank) often wins on durability, water resistance, and replacement cost, making it ideal for high-turnover units, basements, and units with in-unit laundry. Engineered hardwood, while offering a higher rent premium and resale value, is generally better suited for owner-occupied or luxury units due to its susceptibility to water damage and higher maintenance. Solid hardwood is typically not recommended for most rental properties. Making a flooring decision for your rental property? Contact us for an expert consultation on the best flooring installation for Cambridge rentals and personalized recommendations based on your property’s needs. Call Now LVP vs Engineered Hardwood for Rental: Key Considerations When evaluating LVP vs engineered hardwood for rental properties, several factors come into play, each with significant implications for your investment. Understanding these distinctions will help you make an informed choice that aligns with your property’s specific demands and your financial goals. We’ll explore how these two popular flooring options stack up in critical areas for landlords. Tenant Turnover Damage and Longevity Rental properties experience significant wear and tear, especially in high-turnover units. Flooring installation for Cambridge rentals needs to withstand frequent moves, spills, and general tenant activity. LVP is engineered for extreme durability, often handling 5+ tenant cycles with minimal visible damage. Its wear layer, typically 12-20 mil (0.3-0.5 mm) thick, provides excellent resistance to scratches, dents, and scuffs. This makes it a robust choice for properties with frequent tenant changes, such as student housing or short-term rentals. Engineered hardwood, while durable, is more susceptible to surface damage from heavy furniture, pet claws, and dropped objects. It typically handles 2-3 tenant cycles before showing significant signs of wear that might require refinishing. While a quality engineered floor can last 20-30 years, its surface layer is not as forgiving as LVP in high-traffic, high-impact rental environments. Water Resistance and Moisture Concerns Water damage is a landlord’s nightmare, particularly in older Massachusetts homes prone to plumbing issues or in units with in-unit washer/dryers. LVP is a game-changer in this regard; most modern LVP products are 100% waterproof. This means spills, minor leaks, or even a washing machine overflow won’t cause the material to swell, warp, or buckle. It’s an ideal choice for kitchens, bathrooms, basements, and ground-floor units where moisture is a constant concern. Engineered hardwood, while more stable than solid hardwood, is not waterproof. If standing water sits on its surface for an extended period, the wood veneer can swell, delaminate, or warp. This can lead to costly repairs or full-room replacement. Landlords must consider the risk of tenant negligence or unforeseen incidents when choosing engineered hardwood in areas prone to moisture. LVP offers superior water resistance, making it an excellent choice for rental properties in areas prone to spills or moisture. Replacement Granularity and Repair Costs Ease and cost of repair are crucial for rental property owners. When a section of flooring gets damaged, the ability to replace only the affected area can save significant time and money. With LVP, individual planks can often be replaced without disturbing the entire floor. This “plank-by-plank” replacement significantly reduces repair costs and minimizes downtime between tenants. A single damaged plank can be swapped out, making repairs quick and efficient. Engineered hardwood typically requires a full-room sand-and-finish or, in cases of severe damage, a full-room replacement. While some minor scratches can be buffed out, deeper dents or water damage often necessitate more extensive and costly interventions. This can lead to longer vacancies and higher repair bills, impacting your rental income. *Pricing varies based on project scope, materials selected, and site conditions. Contact us for a personalized estimate. Rent Premium and Resale Value In competitive markets like Cambridge and Somerville, flooring can influence both rental rates and property resale value. Hardwood, whether solid or engineered, traditionally commands a higher aesthetic appeal and can add a 5-10%* premium to listed rent prices in these desirable areas, according to a recent NAR survey on rental property improvements. It’s often perceived as a luxury finish, attracting tenants willing to pay more. For owner-occupied units or high-end luxury rentals, this rent premium can justify the higher initial investment and maintenance. LVP, while increasingly sophisticated in appearance, typically adds a smaller rent premium, usually around 2-3%*. Its main selling points are practicality and modern aesthetics rather than traditional luxury. However, its durability and low maintenance can be attractive to a different segment of tenants and can contribute to a faster rental turnover. *Pricing varies based on project scope, materials selected, and site conditions. Contact us for a personalized estimate. Engineered hardwood can elevate a rental’s appeal, potentially allowing for higher rent premiums and increasing overall property value. Initial Cost and Installation The upfront investment is a significant factor for any landlord. LVP is generally more budget-friendly. Installed costs for LVP typically range from $3-5 per square foot*, making it an attractive option for landlords managing multiple units or working with tighter budgets. Installation is often quicker and less labor-intensive, further reducing costs. Engineered hardwood is a more premium product, with installed costs ranging from $7-12 per square foot*. This higher price reflects the natural wood veneer and more complex installation process. While it offers a luxurious feel, the initial investment is considerably higher, requiring a longer payback period through rent premiums. *Pricing varies based on project scope, materials selected, and site conditions. Contact us for a personalized estimate. Tax Depreciation for Rental Property For landlords, understanding the tax implications of property improvements is essential. Both LVP and engineered hardwood, when installed in residential rental
Your Checklist for a Successful Home Improvement Project in Malden
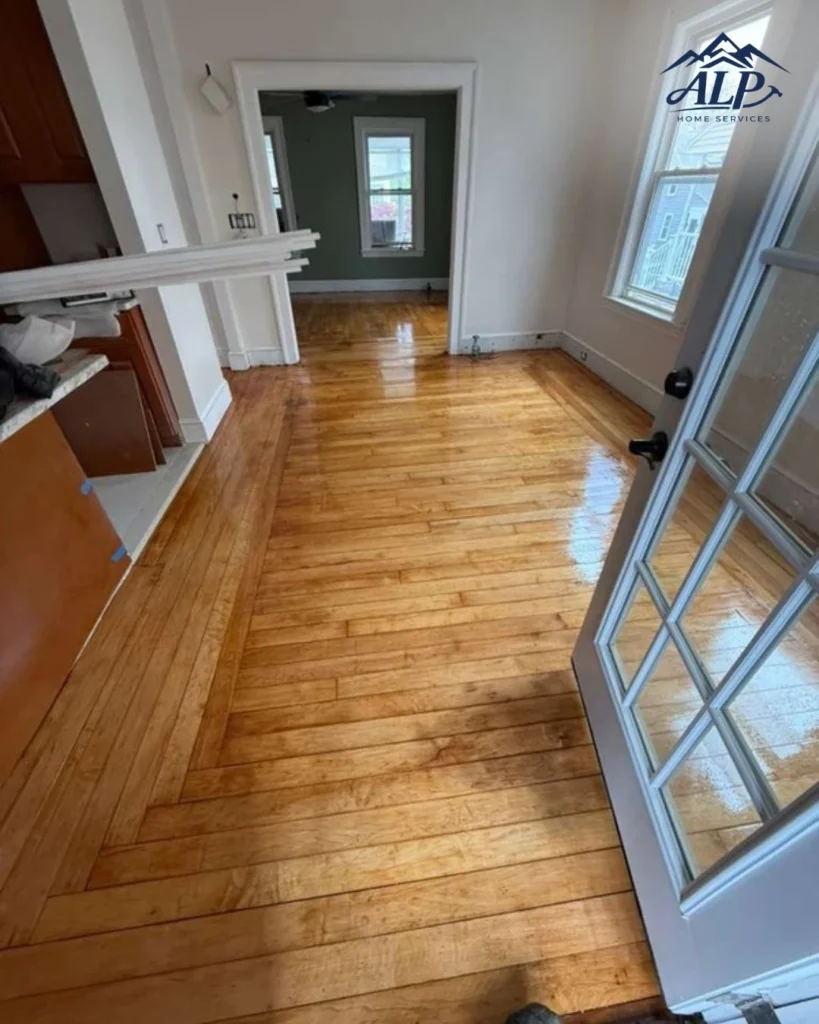
Blog Your Checklist for a Successful Home Improvement Project in Malden Serving homeowners in Malden, MA and surrounding areas Embarking on a home improvement project in Malden, MA, can be an exciting journey, transforming your living space to better suit your needs and style. However, without a clear roadmap, even the most promising projects can encounter unexpected hurdles. A well-structured home improvement checklist is your essential tool for navigating the complexities of renovation, ensuring everything from initial planning to final touches is meticulously managed. This guide is designed to help Malden homeowners plan, execute, and enjoy successful home renovations, whether you’re tackling a minor update or a major overhaul. A successful home improvement project in Malden hinges on careful planning, realistic budgeting, selecting the right professionals, and clear communication. By following a comprehensive checklist, you can minimize stress, avoid common pitfalls, and achieve the results you envision for your home. This article will walk you through the key stages, from defining your vision and securing financing to navigating permits and enjoying your newly improved space. Ready to start your home improvement project in Malden? A well-planned project begins with a conversation. Contact us for a personalized consultation and a free estimate. Call Now Essential Steps for Your Home Improvement Checklist in Malden A thorough home improvement checklist in Malden, MA, should cover several critical phases. Each phase builds upon the last, ensuring a smooth progression and minimizing the chances of costly mistakes or delays. Let’s break down these stages into actionable steps. Phase 1: Defining Your Vision and Goals Before you lift a hammer or choose a paint swatches, clarify what you want to achieve. This initial phase is crucial for setting the direction of your project and ensuring all subsequent decisions align with your ultimate vision. Identify Your Needs and Desires: What problems are you trying to solve? What improvements will enhance your daily life? Do you need more space, better functionality, or an updated aesthetic? For example, a kitchen remodel might aim for more counter space and modern appliances, while a bathroom renovation could focus on accessibility and spa-like features. Research and Inspiration: Gather ideas from magazines, online platforms like Pinterest and Houzz, and local showrooms. Pay attention to styles, materials, and layouts that resonate with you. This research will help you communicate your vision more effectively to contractors and designers. Assess Your Home’s Current Condition: Conduct a realistic assessment of your home. Are there structural issues, outdated systems (plumbing, electrical), or other underlying problems that need to be addressed before cosmetic changes? Addressing these early can prevent expensive surprises later. Prioritize Your Projects: If you have multiple improvements in mind, prioritize them based on urgency, budget, and impact. Sometimes, a smaller project can be a stepping stone to a larger one. Phase 2: Budgeting and Financing Your Project Financial planning is the backbone of any successful home improvement. A realistic budget prevents overspending and ensures you can complete your project without undue financial strain. Establish a Realistic Budget: Research average costs for similar projects in the Malden area. For example, a mid-range bathroom remodel in the Boston metro area typically ranges from $20,000* to $40,000*, while a major kitchen remodel can cost upwards of $60,000* to $100,000* or more, according to Remodeling Magazine’s Cost vs. Value Report. Remember that these are averages and your specific project may vary. Allocate a Contingency Fund: Always set aside 10-20% of your total budget for unexpected expenses. Older homes in Malden, for instance, might reveal hidden issues like outdated wiring or plumbing once walls are opened. Explore Financing Options: Consider home equity lines of credit (HELOCs), home equity loans, personal loans, or cash savings. Understand the interest rates, terms, and repayment schedules for each option. Track Expenses: Maintain a detailed record of all expenditures throughout the project to stay within budget. *Pricing varies based on project scope, materials selected, and site conditions. Contact us for a personalized estimate. From concept to completion, a well-planned home renovation ensures every detail aligns with your vision. Phase 3: Selecting the Right Professionals Hiring a reputable and experienced contractor is paramount to a successful outcome. This is especially true for significant projects where specialized skills are required. Get Multiple Bids: Contact at least three licensed and insured contractors in the Malden area. Ensure they understand your vision and provide detailed, itemized bids. Don’t just compare the bottom line; compare what each bid includes. Check References and Portfolios: Speak to past clients and review their previous work. Look for contractors with experience in projects similar to yours. Online reviews (Google, Yelp, Angi) can also provide valuable insights. Verify Licensing and Insurance: Ensure your contractor is properly licensed and carries adequate liability and workers’ compensation insurance. This protects you from financial responsibility in case of accidents or damages on your property. While we don’t specify license types, ALP Home Services is fully licensed and insured for your peace of mind. Review Contracts Carefully: A clear, written contract should outline the project scope, timeline, payment schedule, materials, warranties, and dispute resolution process. Avoid contractors who push for large upfront payments. A typical payment schedule might involve a deposit (10-30%), progress payments, and a final payment upon satisfactory completion. Communicate Effectively: Establish clear lines of communication with your chosen contractor. Regular meetings or updates can prevent misunderstandings and keep the project on track. Phase 4: Permits, Regulations, and Logistics Navigating local regulations and logistics is a critical, often overlooked, part of the home improvement process. Ignoring permits can lead to fines, project delays, or even the requirement to undo completed work. Understand Malden Building Codes and Permits: Most structural changes, electrical work, plumbing work, and significant renovations require permits from the City of Malden’s Building Department. Your contractor should handle this, but it’s your responsibility as a homeowner to ensure permits are obtained. Projects like replacing windows, adding a deck, or altering load-bearing walls almost always require permits. Plan for Disruptions: Home improvement projects can be disruptive. Discuss
Your Checklist for a Successful Kitchen Remodel in Revere, MA
Blog Your Checklist for a Successful Kitchen Remodel in Revere, MA Serving homeowners in Revere, MA and surrounding areas A kitchen remodel is one of the most impactful home improvements you can undertake, especially in a vibrant community like Revere, MA. To ensure a smooth process and a result that exceeds your expectations, a comprehensive kitchen remodel checklist in Revere, MA, is essential. This guide will walk you through every critical step, from initial planning to final touches, helping you navigate the complexities of renovation with confidence. Whether you’re dreaming of a modern culinary space or a cozy, traditional kitchen, proper preparation is key. By following a structured approach, you can manage your budget, timeline, and design choices effectively. Ready to transform your kitchen? Start with a personalized consultation. Our licensed and insured team provides expert guidance and a clear plan for your Revere kitchen remodel. Call Now Essential Steps for Your Kitchen Remodel Checklist in Revere, MA Embarking on a kitchen remodel requires careful planning and execution. This checklist covers the fundamental stages to help you achieve your dream kitchen in Revere, MA. From defining your vision to selecting the right professionals, each step plays a crucial role in the success of your project. 1. Define Your Vision and Goals Before any demolition begins, clearly define what you want from your new kitchen. Consider your lifestyle, cooking habits, and how you entertain. Do you need more counter space, better storage, or an open-concept layout for gatherings? Gather inspiration from magazines, online galleries, and local showrooms. Creating a mood board with desired colors, materials, and styles can help solidify your vision. Functionality: How will the kitchen be used daily? Aesthetics: What style (modern, traditional, farmhouse) do you prefer? Long-term needs: Will this kitchen grow with your family? 2. Set a Realistic Budget Kitchen remodels can range widely in cost. In the Greater Boston area, a mid-range kitchen remodel typically runs from $30,000 to $70,000*, while a high-end renovation can easily exceed $100,000*. (Source: Remodeling Magazine’s Cost vs. Value Report, New England region). Allocate funds for materials, labor, permits, and a contingency fund (10-20% of the total budget) for unexpected issues, which are common in older Revere homes. *Pricing varies based on project scope, materials selected, and site conditions. Contact us for a personalized estimate. Research costs: Understand average costs for cabinets, countertops, appliances, and labor. Prioritize: Decide which elements are non-negotiable and where you can compromise. Contingency: Always factor in a buffer for unforeseen expenses. A well-planned kitchen remodel integrates seamlessly with your home’s overall design and your lifestyle. 3. Choose Your Team Wisely Selecting the right professionals is paramount. Look for licensed and insured contractors with a strong portfolio of kitchen remodels in Revere and surrounding areas. Check references, read reviews, and ensure clear communication. A good contractor will help you navigate permits, timelines, and material selections. For specialized tasks like custom cabinetry, consider a contractor with expertise in finish carpentry. Licensed & Insured: Verify credentials for peace of mind. Experience: Choose a team with a proven track record in kitchen renovations. Communication: Ensure your contractor is responsive and transparent. 4. Finalize the Design and Materials This is where your vision comes to life. Work with your designer and contractor to finalize the layout, cabinet styles, countertop materials (e.g., granite, quartz, butcher block), tile installation for backsplashes and flooring, lighting, and appliance choices. Consider durability, maintenance, and how materials complement each other. For example, if you’re considering new flooring, explore options like engineered hardwood vs. solid hardwood. Layout efficiency: Optimize the “work triangle” (sink, stove, refrigerator). Material selection: Balance aesthetics with durability and budget. Appliance integration: Ensure appliances fit seamlessly into your design. Choosing the right flooring, from durable tiles to elegant hardwoods, greatly enhances your kitchen’s appeal. 5. Obtain Necessary Permits In Revere, MA, most significant kitchen remodels require permits from the city’s building department. This includes structural changes, plumbing, electrical work, and sometimes even cabinet installation. Your contractor should handle this process, ensuring all work complies with local codes and regulations. Skipping permits can lead to fines, delays, and issues when selling your home. Contractor responsibility: Ensure your contractor manages permit applications. Code compliance: All work must meet Revere’s building codes. Inspection schedule: Be aware of required inspections throughout the project. Managing Your Kitchen Remodel in Revere, MA During Construction Once the planning is complete and permits are secured, the construction phase begins. This stage demands ongoing communication and attention to detail to keep the project on track. 1. Demolition and Structural Changes The first physical step is often demolition. This can be messy and disruptive, so prepare your home by covering furniture and sealing off work areas. If your remodel involves moving walls or altering the structure, these changes will occur early in this phase. Ensure all old materials are disposed of properly, adhering to Revere’s waste management guidelines. Protection: Safeguard your home from dust and debris. Structural integrity: Ensure any changes are professionally engineered and executed. 2. Rough-Ins: Plumbing, Electrical, and HVAC After demolition, the “rough-in” work begins. This involves installing new plumbing lines, electrical wiring, and any HVAC ductwork behind the walls and floors. These critical systems must be installed correctly to avoid future problems. This is also the time for any necessary inspections before walls are closed up. Licensed tradesmen: All plumbing and electrical work should be done by licensed professionals. Inspections: Do not proceed to the next stage until rough-in inspections are passed. 3. Wall Treatments, Flooring, and Cabinet Installation With the rough-ins complete, walls can be prepped, painted, or new drywall installed. Next, the flooring installation takes place, followed by the installation of your chosen cabinets. Cabinet installation is a precise job that requires careful measurement and leveling to ensure a perfect fit and finish. Painting: Consider durable, washable paints for kitchen walls. Cabinetry: Ensure cabinets are level and securely mounted. From custom cabinetry to intricate trim work, professional carpentry defines the character of your renovated kitchen. 4. Countertops, Backsplash,
Top 5 Benefits of Professional Exterior Painting in Everett, MA
Blog Top 5 Benefits of Professional Exterior Painting in Everett, MA Serving homeowners in Everett, MA and surrounding areas Professional exterior painting in Everett, MA offers far more than just a fresh coat of color. It’s a critical investment that protects your home from the harsh New England climate, enhances curb appeal, and can significantly increase your property value. From safeguarding against moisture damage to improving energy efficiency, a high-quality paint job provides a multitude of benefits that extend well beyond aesthetics. Understanding these advantages can help you appreciate why professional exterior painting is a wise decision for any Everett homeowner. This guide will delve into the top five benefits, offering insights into how a professional approach makes a lasting difference for your home’s longevity and appearance. Ready to protect and beautify your home? Discover the difference professional exterior painting can make. Call Now Unpacking the Benefits of Exterior Painting in Everett, MA Exterior painting is an essential maintenance task for any home, especially in a region like Everett, MA, where homes endure significant weather fluctuations throughout the year. From humid summers to freezing winters, a well-applied paint coat acts as your home’s first line of defense. The true benefits, however, go much deeper than just looking good. Let’s explore the key advantages. 1. Enhanced Protection Against New England Weather The primary role of exterior paint is to protect your home’s structural integrity. In Everett, MA, this means standing up to everything from heavy snowfall and ice in winter to driving rain and strong winds in spring and fall, and even the occasional humid summer day. A professional paint job creates a durable barrier against moisture penetration, which is crucial for preventing wood rot, mildew growth, and other forms of deterioration. According to the American Coatings Association, exterior paint can prevent up to 80% of moisture absorption into exterior surfaces, significantly reducing the risk of costly structural damage. Without this protection, exposed wood and siding can quickly degrade, leading to expensive repairs down the line. High-quality paints, applied correctly by experienced professionals, offer superior adhesion and flexibility, resisting cracking and peeling even with temperature extremes. This robust shield is vital for maintaining the longevity of your home’s exterior materials. 2. Significant Boost in Curb Appeal and Property Value A freshly painted exterior dramatically improves your home’s aesthetic appeal, making it stand out in the neighborhood. This is particularly important if you’re considering selling your home in the future. A well-maintained exterior signals to potential buyers that the home has been cared for, often leading to a quicker sale and a higher asking price. Real estate experts widely agree that exterior painting offers one of the highest returns on investment for home improvement projects. A study by the National Association of Realtors found that exterior paint jobs can yield a return of up to 100% or more at resale. Beyond monetary value, the visual appeal of a fresh paint job creates a welcoming atmosphere, reflecting pride of ownership and enhancing the overall beauty of your Everett property. Choosing modern, appealing colors can further elevate your home’s presence and charm. A professional paint job not only enhances your home’s curb appeal but also provides a crucial layer of protection against the elements. 3. Early Detection of Potential Issues The process of preparing a home for exterior painting involves thorough inspection of all surfaces. This meticulous preparation often uncovers underlying issues that might otherwise go unnoticed until they become more severe and costly. Professional painters look for signs of wood rot, termite damage, mildew, water leaks, and deteriorated siding. For example, during the scraping and sanding phase, painters might find areas where moisture has penetrated, indicating a need for siding repair or gutter maintenance before painting can proceed. Addressing these problems early prevents them from escalating into major structural damage. This proactive approach saves homeowners significant money and stress in the long run. It’s a hidden benefit that transforms a painting project into a comprehensive home health check-up. 4. Improved Energy Efficiency While not immediately obvious, exterior paint can play a role in your home’s energy efficiency. Lighter-colored paints reflect more sunlight and heat, which can help keep your home cooler during Everett’s warmer months, reducing the load on your air conditioning system. Conversely, darker colors absorb more heat, which can be beneficial in colder climates to naturally warm your home, though this effect is less pronounced than reflective properties. Modern, high-quality paints also offer better insulation properties than older, faded coats. They can help seal minor cracks and gaps in your siding, preventing drafts and heat loss during winter. This improved thermal performance translates to lower energy bills year-round. While the impact isn’t as dramatic as new insulation or windows, it’s a measurable contribution to your home’s overall energy efficiency, making it a smart choice for long-term savings. From meticulous prep work to the final coat, professional painting ensures a flawless finish and long-lasting protection. 5. Cost-Effectiveness and Longevity Investing in professional exterior painting might seem like a significant upfront cost, with national averages ranging from $3,000 to $8,000*, but it is a highly cost-effective strategy in the long run. The durability of professional-grade paints and the expertise of skilled painters ensure that the job lasts much longer than a DIY attempt, typically 5-10 years, depending on the paint quality and climate. This longevity means less frequent repainting, saving you money on materials and labor over time. *Pricing varies based on project scope, materials selected, and site conditions. Contact us for a personalized estimate. Furthermore, professional painters understand proper surface preparation, which is key to a long-lasting finish. They use specialized equipment and techniques to clean, repair, prime, and apply paint evenly, preventing common issues like peeling paint that can plague less experienced jobs. For example, failing to properly address existing peeling paint can lead to a new coat flaking off within a year, as discussed in our article How to Stop Peeling Paint on Your New England Home’s Exterior. By
Enhancing Your Somerville Home with Custom Finish Carpentry
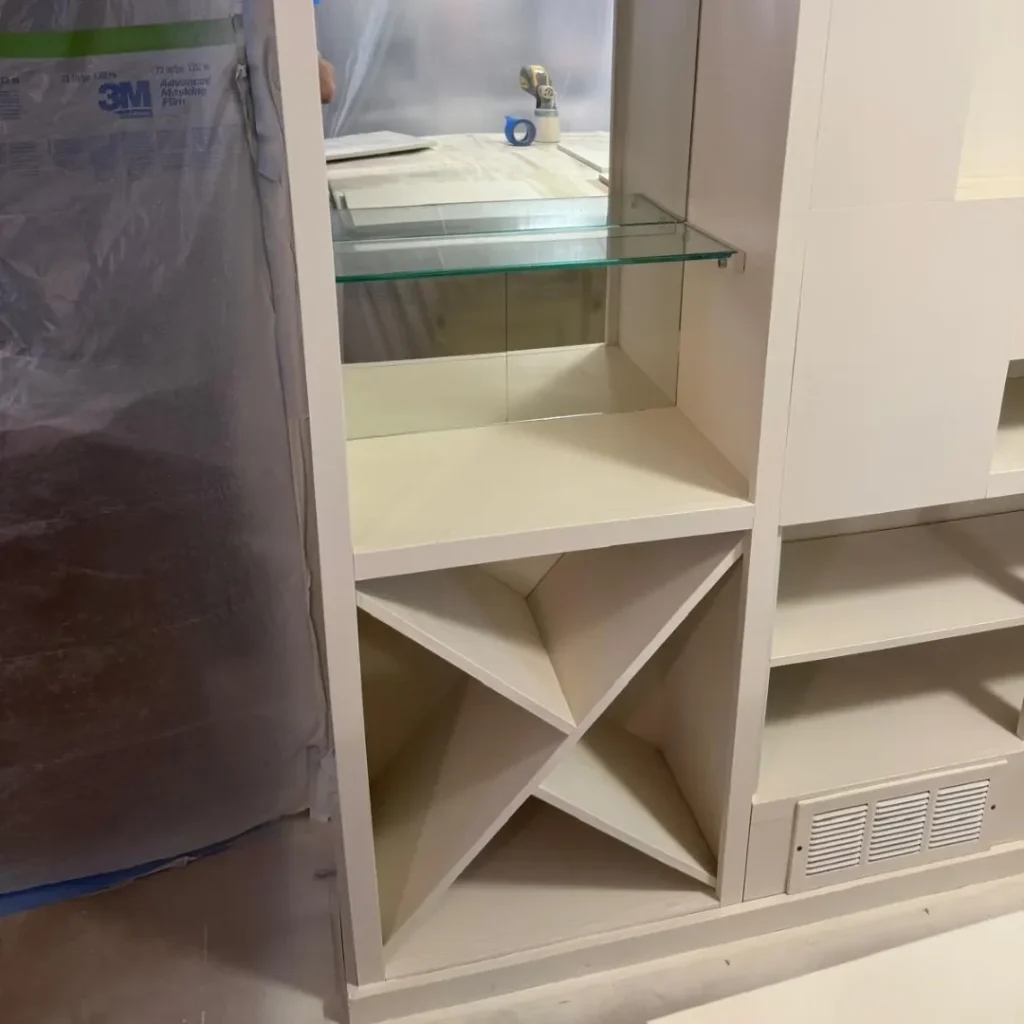
Blog Enhancing Your Somerville Home with Custom Finish Carpentry Serving homeowners in Somerville, MA and surrounding areas In Somerville, MA, where historic charm meets modern living, the details truly define a home. From the classic Victorian triple-deckers to renovated lofts, homeowners understand the value of craftsmanship. This is where custom finish carpentry comes in, transforming ordinary spaces into extraordinary ones with precision and artistry. Whether you’re looking to restore original architectural elements or add contemporary flair, selecting the right finish carpentry services for your Somerville home is crucial. This guide will explore the various aspects of finish carpentry, its benefits, and what to consider when planning your next home enhancement project. Ready to elevate your home’s aesthetics? Discover how custom finish carpentry can add lasting beauty and value to your Somerville residence. Call Now What is Finish Carpentry and Why is it Essential for Your Somerville Home? Finish carpentry refers to the visible, aesthetic elements of woodworking that complete the interior and exterior of a home. Unlike rough carpentry, which focuses on structural framing, finish carpentry is all about the fine details that contribute to a property’s character, elegance, and functionality. For a Somerville home, these details are particularly important given the city’s rich architectural heritage. These intricate details include everything from baseboards and crown molding to custom built-ins and stair railings. In older Somerville homes, preserving or replicating original finish carpentry can maintain historical integrity, while in newer constructions, it offers an opportunity to inject unique personality and sophisticated design. Key elements of finish carpentry: Trim and molding: Baseboards, crown molding, chair rails, and window/door casings add architectural interest and define spaces. Built-ins and cabinetry: Custom bookshelves, entertainment centers, window seats, and storage solutions maximize space and integrate seamlessly with your home’s design. Wainscoting and paneling: These decorative wall treatments add texture, depth, and a touch of classic elegance. Staircases and railings: Crafting or refinishing banisters, newel posts, and balusters for safety, style, and a grand entrance. Door and window installation: Precision installation of interior and exterior doors and windows, ensuring proper fit and aesthetic appeal. From intricate crown molding to custom built-ins, finish carpentry adds character and functionality to any living space. Custom Finish Carpentry for Different Somerville Home Styles Somerville boasts a diverse array of home styles, each with its own unique carpentry needs. A skilled finish carpenter understands these nuances and can tailor their work to complement your home’s existing architecture or help you achieve a desired new look. Victorian and Colonial Homes Many Somerville residences are historic Victorian or Colonial-style homes. For these properties, finish carpentry often involves: Restoration of original details: Replicating or repairing intricate millwork, ornate trim, and period-specific door and window casings. Custom mantels: Designing and installing fireplace mantels that reflect the home’s historical era. Built-in bookcases: Adding elegant, built-in storage that blends seamlessly with the traditional aesthetic, often seen in living rooms or studies. Contemporary and Modern Residences For newer constructions or homes with a modern aesthetic, finish carpentry can be used to create clean lines and minimalist designs: Sleek trim profiles: Using simpler, more streamlined molding for a contemporary look. Floating shelves: Installing custom floating shelves that offer both storage and a modern design element. Custom paneling: Creating accent walls with geometric paneling or flush-mounted panels for a sophisticated, minimalist feel. Revitalizing Any Space Regardless of your home’s age or style, custom finish carpentry can address specific challenges and enhance functionality. For example, a small Somerville apartment can benefit from custom storage solutions that maximize every inch, while a larger family home might need elegant wainscoting to protect walls in high-traffic areas. Investing in professional finish carpentry ensures that the work not only looks beautiful but also stands the test of time, adding significant value and appeal to your property. Thinking about a home renovation? Consider how finish carpentry can provide the perfect finishing touch. A well-designed trim package or custom built-in can transform the entire feel of a room. The Process of Hiring a Finish Carpentry Specialist for Your Somerville Home Choosing the right carpentry specialist is key to a successful project. Here’s what to look for when seeking finish carpentry services in Somerville. Experience and Expertise Look for carpenters with a proven track record in finish carpentry. Ask to see a portfolio of their previous work, especially projects similar to yours. Experience with different wood types, finishes, and design styles is a significant plus. A skilled carpenter should be able to offer creative solutions and advise on the best materials for your specific needs. Custom Design Capabilities Custom finish carpentry means tailoring the work to your unique vision. Ensure your chosen carpenter can translate your ideas into detailed plans and execute them precisely. This might involve sketches, CAD drawings, or material samples to ensure you’re on the same page before construction begins. Attention to Detail and Quality Finish carpentry is all about precision. Every joint, cut, and finish should be flawless. Discuss the types of wood, stains, and paints they use, and ensure they prioritize high-quality materials that will last. A true craftsman takes pride in the smallest details. Quality finish carpentry requires meticulous attention to detail and a deep understanding of materials and design. Cost Considerations for Finish Carpentry in Somerville, MA The cost of finish carpentry can vary widely based on several factors, including the scope of the project, the complexity of the design, the type of materials used, and the labor involved. While it’s difficult to provide exact figures without a detailed assessment, understanding these factors can help you budget effectively. Factors influencing cost: Scope of work: A simple baseboard installation will be significantly less expensive than a complex custom built-in unit or an entire room of wainscoting. Material choice: Premium hardwoods like cherry or walnut will cost more than common woods such as pine or MDF. Exotic woods or reclaimed materials also impact the price. Design complexity: Intricate carvings, curved elements, or highly customized designs require more labor and specialized skills, increasing costs.
Engineered Hardwood vs Solid Hardwood for Boston-Area Condos
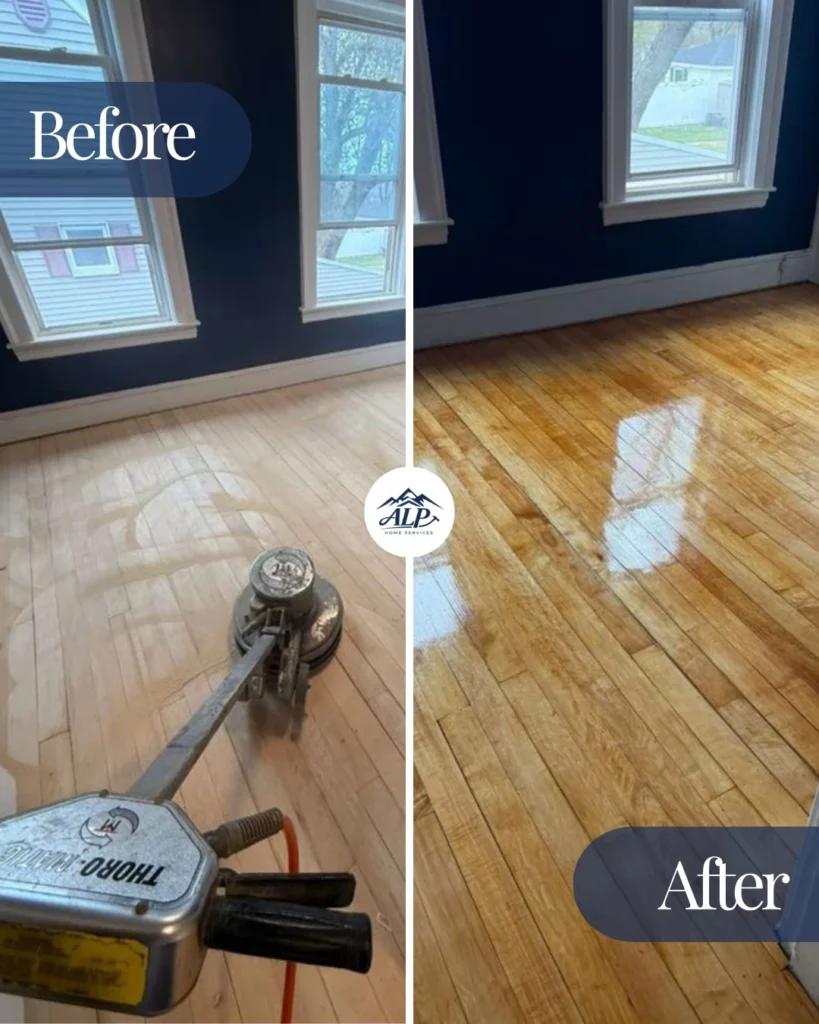
Blog Engineered Hardwood vs Solid Hardwood for Boston-Area Condos Serving homeowners in Somerville and surrounding areas Choosing the right flooring for your Boston-area condo is a big decision, especially when it comes to hardwood. You’ve likely heard of both engineered hardwood and solid hardwood, but which one is truly best suited for the unique challenges of condominium living in Somerville, Cambridge, or Boston? The answer isn’t always as simple as personal preference. This guide will walk you through the critical differences between engineered hardwood vs solid hardwood, focusing on the specific factors that impact condo owners. From concrete slabs and HOA rules to humidity swings, we’ll help you understand why one option often stands out as the superior choice for your urban dwelling. Quick Answer: Engineered hardwood is the right choice for almost every Boston-area condo. Most condominium buildings sit on concrete slabs (no nailing surface for solid hardwood), have HOA bylaws requiring glue-down or floating floors, and live with humidity swings that cause solid wood to cup or gap. Engineered’s plywood core absorbs these movements; solid wood cannot. Call Now Engineered Hardwood vs Solid Hardwood: The Concrete Slab Reality of Boston Condos One of the biggest distinctions between engineered and solid hardwood, especially for Boston-area condos, lies beneath the surface: the subfloor. Most modern condominium buildings, particularly those above the ground floor in Somerville, Cambridge, and Boston, are built with concrete slabs. This presents a significant challenge for traditional solid hardwood installation. Solid hardwood floors are typically installed by nailing them directly into a wood subfloor. When you have a concrete slab, this isn’t possible. You would need to install a plywood subfloor over the concrete, which adds height, cost, and complexity, and may not even be permitted by your building’s HOA. Engineered hardwood, however, is designed for greater versatility. It can be installed as a floating floor, or more commonly, glued directly to a concrete slab, making it a far more practical solution for urban condos. Modern condo buildings in Boston and surrounding areas frequently feature concrete subfloors, making engineered hardwood a more adaptable and often necessary choice for flooring installation. Navigating HOA Bylaws and Sound-Attenuation Requirements Condominium living comes with a unique set of rules, and flooring is almost always a hot topic in HOA bylaws. Many Boston-area HOAs have strict requirements regarding noise transmission between units, often mandating specific sound-attenuation ratings for new flooring installations. These ratings are typically measured by an Impact Insulation Class (IIC) score, with many HOAs requiring an IIC of 50 or higher. Solid hardwood, when nailed down, generally offers poor sound insulation. Achieving the required IIC rating often involves extensive and costly soundproofing measures. Engineered hardwood, on the other hand, is frequently installed with an underlayment, such as cork, which can significantly improve sound absorption and help meet strict HOA requirements. This makes engineered hardwood a much easier and more cost-effective option for compliance. Always check your specific HOA’s flooring rules before making a decision. A reputable contractor specializing in flooring installation in Cambridge and the greater Boston area can help you understand and comply with these regulations. Humidity Swings Inside High-Rise Condos: A Silent Destroyer of Solid Wood Boston’s climate is notoriously temperamental, swinging from dry, frigid winters (exacerbated by forced-air HVAC systems) to humid, sticky summers. These dramatic shifts in ambient moisture levels are a major concern for hardwood floors, especially in high-rise condos where environmental controls can be tricky. Solid hardwood is highly susceptible to moisture changes. In dry conditions, it can shrink, leading to unsightly gaps between boards. In humid conditions, it can absorb moisture, causing the wood to expand, cup, or buckle. These movements can damage the floor and even compromise its structural integrity over time. Engineered hardwood is specifically designed to mitigate these issues. Its multi-ply core, typically made of cross-laminated plywood, provides exceptional stability and resistance to moisture-induced expansion and contraction. This layered construction allows engineered wood to perform far better in environments with fluctuating humidity, making it a more resilient choice for your Boston condo. The layered construction of engineered hardwood provides superior stability against humidity fluctuations, a common challenge in Boston’s variable climate. Engineered Construction: Plywood Cross-Ply vs. HDF Core – What Matters for Stability Not all engineered hardwood is created equal. The core material plays a crucial role in its stability, durability, and overall performance. The two most common core types are plywood cross-ply and High-Density Fiberboard (HDF). Plywood Cross-Ply Core: This is generally considered the superior option. It consists of multiple layers of plywood glued together with the grain running in opposite directions. This cross-ply construction provides exceptional dimensional stability, making the floor highly resistant to warping, cupping, and gapping caused by changes in temperature and humidity. It also offers better screw holding power, which can be beneficial if repairs are ever needed. HDF Core: HDF cores are made from compressed wood fibers. While they offer good stability, they are generally less resistant to moisture than plywood cores and can swell if exposed to significant water. HDF cores are often found in more budget-friendly engineered products. For a Boston-area condo, especially given the climate and potential for moisture, a high-quality engineered hardwood with a plywood cross-ply core is highly recommended for long-term stability and peace of mind. Wear Layer Thickness: Ensuring Longevity and Refinishing Potential The wear layer is the top layer of real hardwood veneer on an engineered floor. This is the part that you see and walk on, and it’s also the part that can be sanded and refinished. The thickness of this wear layer directly correlates with the floor’s lifespan and its ability to be renewed. 2mm Minimum: A wear layer of at least 2mm is generally considered the minimum to allow for one light refinishing in its lifetime. This can extend the life of your floor if it experiences minor scratches or wear. 4mm+ for 2-3 Refinishes: For greater longevity and the ability to refinish your floors multiple times (typically 2-3 times), look for an
How to Stop Peeling Paint on Your New England Home’s Exterior
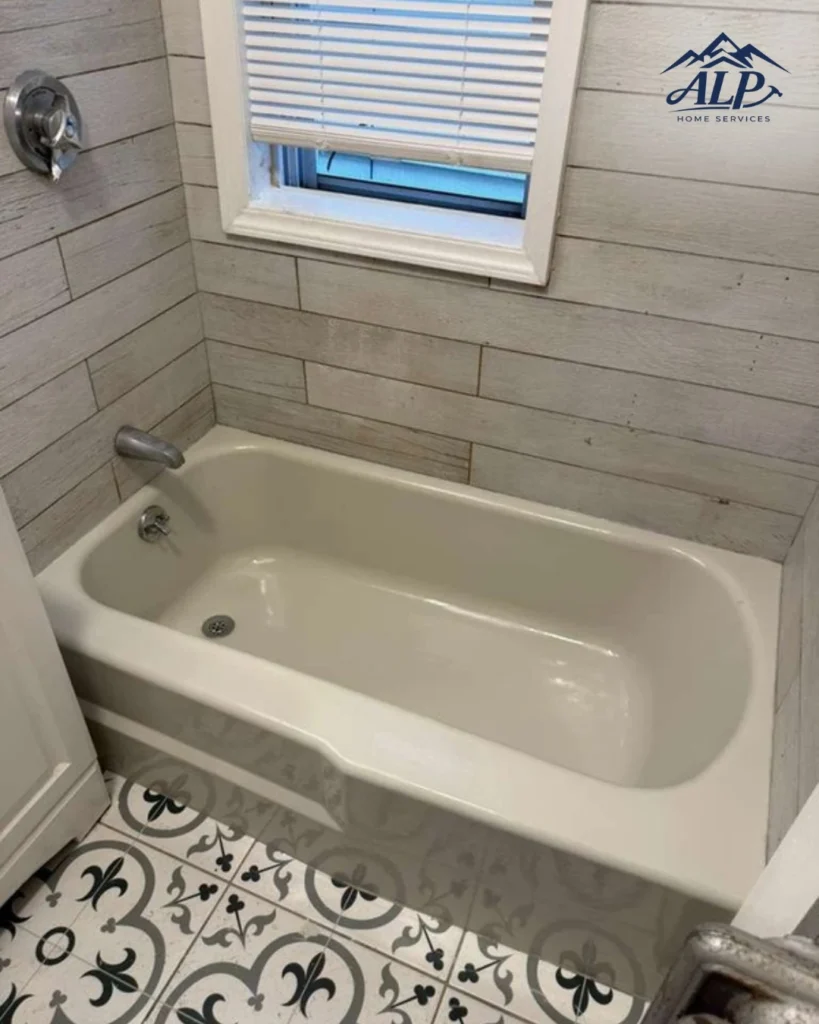
Blog How to Stop Peeling Paint on Your New England Home’s Exterior Serving homeowners in Medford and surrounding areas Peeling paint on your New England home’s exterior is more than just an aesthetic issue; it’s a sign that your home’s protective layer is failing against the region’s unique climate challenges. From harsh winters to humid summers, New England weather puts exterior paint to the ultimate test. Understanding why paint peels and how to properly address it is crucial for maintaining your home’s curb appeal and structural integrity. This guide will walk you through diagnosing the cause of peeling, the essential prep work, selecting the right paint, and finding the perfect weather window for a lasting finish. Quick Answer: Exterior paint peels in New England primarily because of freeze-thaw moisture cycles, not poor paint quality. The fix is sequence: scrape failing paint to bare wood or sound substrate, prime exposed wood within 48 hours, and repaint with a high-quality 100% acrylic latex during a 3-day stretch above 50°F* with no rain forecast. Call Now Why Exterior Paint Peels in New England: The Climate’s Unique Brutality New England’s climate is notoriously tough on exterior paint. It’s not just one factor, but a combination of environmental stressors that contribute to paint failure. Understanding these unique challenges is the first step in preventing recurring peeling paint exterior new england homes. Freeze-Thaw Cycles The most significant culprit is the relentless freeze-thaw cycle. Moisture penetrates tiny cracks in the paint film. When temperatures drop below freezing, this trapped moisture turns to ice, expanding and pushing the paint away from the substrate. When it thaws, the water recedes, leaving a void. This cycle repeats, weakening the paint’s adhesion until it eventually peels. Salt Spray and Humidity Coastal areas experience additional stress from salt spray, which can accelerate paint degradation. High humidity during the summer months also contributes by keeping surfaces damp for longer periods, promoting mildew growth and further weakening paint adhesion. Ice Dam Runoff In winter, ice dams forming on roofs can cause water to back up and seep behind exterior trim and siding. This constant exposure to moisture from runoff, especially in areas not designed to handle it, can lead to severe peeling and wood rot. The 4 Most Common Peeling Patterns: Diagnosing the Problem Before you can fix peeling paint, you need to understand the type of peeling you’re seeing. Different patterns indicate different underlying causes, which will dictate your repair strategy. 1. Alligatoring (or Crazing) This pattern resembles alligator skin, with fine cracks forming a network across the paint surface. It typically happens when a hard, inflexible paint (like an oil-based paint) is applied over a softer, more flexible one (like latex), or when a new coat is applied before the previous one is fully dry. Excessive paint thickness can also cause it. 2. Flaking (or Scaling) Flaking occurs when small pieces of paint detach from the surface. This is often due to poor surface preparation, moisture penetration, or using low-quality paint that lacks proper adhesion. It can range from small, isolated flakes to widespread delamination. 3. Blistering Blisters are bubbles that form under the paint film, often appearing soon after painting or during hot, humid weather. They are almost always caused by moisture trying to escape from the substrate beneath the paint. This can be from rain, high humidity, or even interior moisture migrating through the walls. 4. Intercoat Peeling This occurs when the topcoat separates from a previous coat, but not necessarily down to the bare substrate. It indicates poor adhesion between two layers of paint, often due to inadequate cleaning or sanding between coats, or applying an incompatible paint type over another. Proper surface preparation is key to preventing peeling paint, ensuring each coat adheres correctly to the substrate. Diagnosis: Which Paint Layer is Failing? A critical step in fixing peeling paint is determining how deep the problem goes. Is it just the top coat, or are all layers failing down to the bare wood? Top coat only: If only the outermost layer is peeling, it suggests an intercoat adhesion issue. The underlying paint is still sound. All layers down to wood: This is a more serious problem, often indicative of significant moisture intrusion or complete paint system failure. It requires more extensive preparation. Carefully examine the peeled areas. If you can see bare wood, you know you’re dealing with a deeper issue that requires starting from scratch on those sections. If you see an older, intact layer of paint underneath, your prep might be less intensive. The Essential Prep Sequence: Scraping, Sanding, and Priming Proper preparation is the most important step in preventing future peeling. Rushing this stage is a guaranteed way to see your hard work fail prematurely. Scraping Failing Paint Use a good quality paint scraper to remove all loose, peeling, or blistering paint. Don’t be shy; if it’s lifting, it needs to go. Feather the edges of the remaining paint so there are no hard lines. If your home was built before 1978, be aware of potential lead-based paint and follow safety guidelines. The MassDEP provides important information on lead paint safety guidelines, including the RRP rule for renovations. Sanding for Adhesion After scraping, sand the entire surface. Start with 40-grit sandpaper to smooth out any ridges from scraping and to remove stubborn paint. Follow up with 80-grit sandpaper to create a smooth, uniform surface that primer and paint can adhere to. This also helps feather the edges where old paint meets bare wood. Priming Bare Wood Any exposed bare wood must be primed. Primer creates a bonding surface for the topcoat and helps seal the wood, preventing moisture absorption and tannin bleed. Apply primer to bare spots within 48 hours of exposure to prevent new moisture from soaking in. Ensure any necessary trim repair before painting is completed during this stage. Replacing rotten wood is crucial for the longevity of your new paint job. From scraping old paint to repairing damaged trim, thorough preparation
Subway Tile vs Porcelain Tile for Bathroom Renovation: Boston Contractor’s Guide
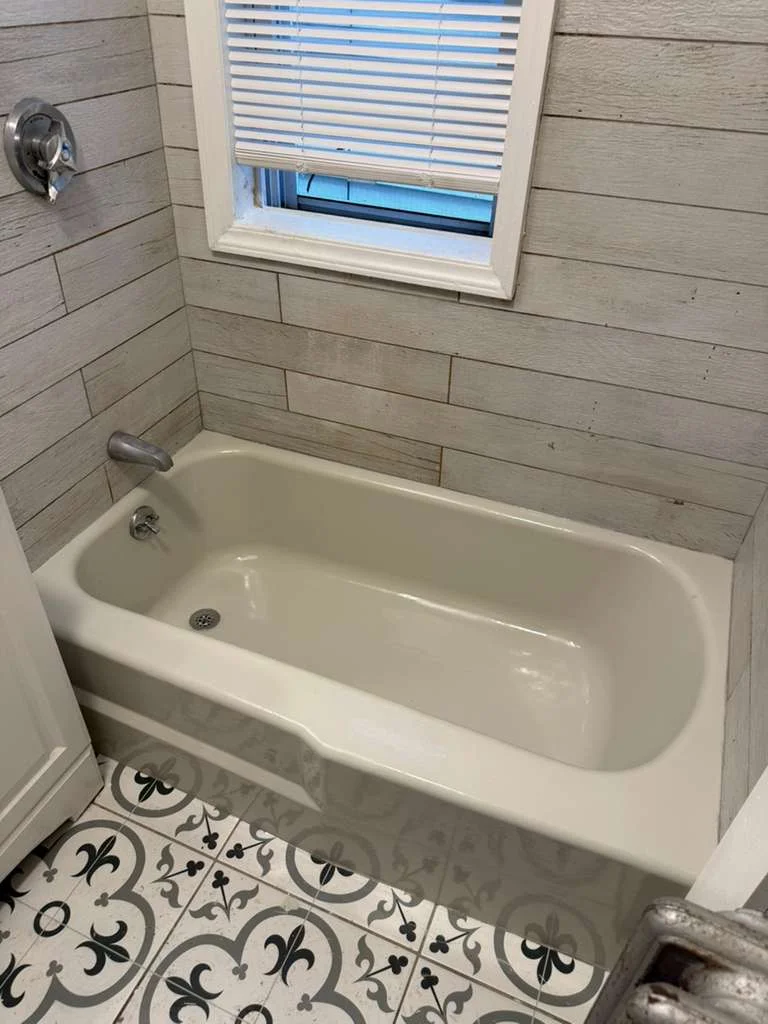
Blog Subway Tile vs Porcelain Tile for Bathroom Renovation: Boston Contractor’s Guide Serving homeowners in Cambridge and surrounding areas When planning a bathroom renovation in Cambridge, one of the first decisions homeowners face is choosing the right tile. The options can seem endless, but two popular choices consistently come up: subway tile and porcelain tile. While often discussed as if they are opposing choices, they actually refer to different aspects of tile. Subway tile describes a specific shape, while porcelain refers to the material. This guide from ALP Home Services will clarify the differences, help you understand the pros and cons of each, and empower you to make an informed decision for your next tile installation in Cambridge. Atomic Answer: Subway tile is a tile shape (rectangular, usually 3×6 or 4×8 inches) traditionally made from ceramic, while porcelain refers to the material itself. You can have porcelain subway tile. The real choice is between ceramic and porcelain: porcelain is denser, less absorbent, more durable for shower floors and high-traffic bathrooms, but harder to cut and roughly 30% more expensive to install*. Call Now *Pricing varies based on project scope, materials selected, and site conditions. Contact us for a personalized estimate. Understanding Subway Tile vs Porcelain Tile: Shape vs. Material The initial confusion for many homeowners looking at subway tile vs porcelain tile bathroom options stems from mixing up shape with material. Let’s break down what each term actually means: What is Subway Tile? Subway tile refers to a distinctive rectangular shape, most commonly 3×6 inches, though 2×4, 4×8, or even larger formats are available. Its classic, clean aesthetic originated in the New York City subway stations in the early 20th century. Traditionally, subway tiles are made from ceramic, but today you can find them in various materials, including porcelain, glass, and natural stone. The appeal lies in its versatility and timeless look, allowing for numerous patterns like herringbone, offset, or straight stack (as described by The Spruce). What is Porcelain Tile? Porcelain tile, on the other hand, describes the material composition. It’s a type of ceramic tile made from a very fine, dense clay that is fired at extremely high temperatures. This process results in a tile that is significantly harder, less porous, and more durable than traditional ceramic tile. Porcelain tile can be manufactured in almost any shape or size, including the classic subway tile dimension. So, while you can have ceramic subway tile, you can also have porcelain subway tile. The critical distinction for your bathroom renovation in Cambridge comes down to the material properties of ceramic versus porcelain. Whether you choose classic ceramic or durable porcelain, the right tile installation makes all the difference in a Cambridge bathroom. Porcelain’s Density and Low Water Absorption: Why it Matters for Bathrooms The primary advantage of porcelain tile for bathroom applications is its exceptional density and very low water absorption rate. According to the Tile Council of North America (TCNA) and ANSI standards, a tile is classified as porcelain if it has a water absorption rate of 0.5% or less. In contrast, standard ceramic tiles typically have a water absorption rate of 3% or higher. What This Means for Your Bathroom: Moisture Resistance: Porcelain’s low absorption makes it highly resistant to water penetration, mold, and mildew growth. This is crucial for environments like bathrooms, particularly in shower enclosures and around bathtubs. Stain Resistance: Because it’s so dense, porcelain is also highly resistant to stains, making it easier to clean and maintain in a busy bathroom. Durability: The density also translates to superior hardness and resistance to chipping and scratching, vital for areas with heavy foot traffic or where objects might be dropped. For homeowners in Cambridge, this enhanced moisture and stain resistance means a longer-lasting, lower-maintenance bathroom surface, especially important in humid New England climates. Where Porcelain Tile Excels in Bathroom Renovations Given its robust properties, porcelain tile is the preferred choice for several key areas within a bathroom, especially for those seeking maximum durability and longevity. Shower Floors and Pans This is where porcelain truly shines. Shower floors are constantly exposed to water, soap, and foot traffic. Porcelain’s low water absorption prevents moisture from seeping into the subfloor and causing damage, while its durability stands up to daily use. Its inherent slip resistance (when textured or unglazed) also makes it a safer option for wet areas. High-Traffic Bathrooms and Mudrooms If your bathroom sees a lot of foot traffic, perhaps it’s a main family bathroom or connected to a mudroom, porcelain’s resistance to wear and tear is invaluable. It can withstand the scuffs and impacts that might chip or scratch softer ceramic tiles. Anywhere with Freeze-Thaw Exposure (New England Relevance) While less common for interior bathrooms, if you’re considering tile for an unheated sunroom bathroom or an outdoor shower area that might experience freezing temperatures, porcelain is the only choice. Its minimal water absorption prevents water from expanding when frozen and cracking the tile, a significant concern in the New England climate. A professional bathroom flooring contractor understands the importance of durable, water-resistant materials like porcelain for lasting results. Where Ceramic Tile Still Wins: Walls, Backsplashes, and Budget-Friendly Remodels Despite porcelain’s advantages, traditional ceramic tile still holds its own, especially when considering certain applications and project budgets. Shower Walls and Backsplashes For vertical surfaces like shower walls or bathroom backsplashes, ceramic tile is often an excellent choice. These areas don’t experience the same direct impact or constant standing water as a shower floor. Ceramic tiles are lighter and easier to cut, which can simplify installation and reduce labor costs. They offer an enormous range of colors, patterns, and glazes, making them a versatile design element. Lower-Budget Remodels Ceramic tile is generally more affordable per square foot than porcelain. While installation costs are similar, the material savings can be significant for larger projects or those with tighter budgets. If your bathroom isn’t a high-traffic zone or a shower floor, ceramic can provide a beautiful and functional solution without breaking